Preparing Your Garage Walls: The Foundation for a Flawless Finish
Proper preparation sets the stage for a successful garage wall painting project. Start by clearing out the garage completely. Remove all items from the walls and floor. This provides unobstructed access to all surfaces. Sweep and vacuum the entire space to remove dust and debris. Wash the walls thoroughly with a degreaser or all-purpose cleaner. Pay special attention to areas with oil stains or grime buildup.
Allow the walls to dry completely before proceeding. Inspect the walls for cracks, holes, or other damage. Fill small cracks and holes with spackling compound. Use a putty knife to apply the compound smoothly. For larger holes, consider using a patch kit or drywall repair. Sand the repaired areas once dry to create a smooth surface.
Wipe down the walls again to remove any dust from sanding. Cover the floor with drop cloths or plastic sheeting. Use painter’s tape to protect any areas you don’t want to be painted, such as electrical outlets or windows. Remove light switch and outlet covers for a cleaner finish. Consider applying a dehumidifier to the garage if humidity is high. This preparation process may take time, but it ensures a professional-looking result.
Equipping Yourself for the Perfect Garage Paint Job
Choosing the right paint and tools proves crucial for a durable and attractive finish. Select a paint specifically formulated for garage walls. Look for options that resist moisture, mildew, and stains. Consider paints with added durability for high-traffic areas. Opt for a semi-gloss or satin finish for easy cleaning. Choose a color that brightens the space and complements your home’s exterior.
Calculate the square footage of your garage walls to determine how much paint to buy. Purchase slightly more paint than needed to account for touch-ups. Invest in high-quality brushes and rollers for smoother application. Choose a roller with a medium nap for textured surfaces. Select angled brushes for cutting in around edges and corners.
Consider using an extension pole for the roller to reach high areas easily. Purchase a paint tray and liners for convenient pouring and cleanup. Gather additional supplies such as a sturdy ladder, sandpaper, and clean rags. Don’t forget personal protective equipment like gloves, goggles, and a dust mask. Having the right tools and materials on hand streamlines the painting process and ensures better results.
Priming Your Garage Walls: Creating the Perfect Canvas
Priming garage walls creates an ideal surface for paint adhesion. It covers stains, evens out the surface, and improves paint durability. Choose a primer based on your wall material and condition. For new drywall, use a drywall sealer or PVA primer. Opt for a stain-blocking primer for walls with water damage or stubborn marks. Use a bonding primer for glossy or hard-to-paint surfaces. Apply primer using a roller for large areas and a brush for edges and corners.
Work in sections, maintaining a wet edge to avoid lap marks. Allow the primer to dry completely according to the manufacturer’s instructions. Sand lightly between coats for an ultra-smooth finish. Apply a second coat of primer if needed, especially for dark or stained walls. For persistent stains, use a specialized stain-blocking primer. Allow the final coat of primer to dry fully before moving on to painting. Proper priming sets the stage for a professional-looking and long-lasting paint job.
Painting Like a Pro: Tips and Tricks for Garage Walls
Painting garage walls requires technique and patience for optimal results. Start by cutting in around edges, corners, and fixtures with a brush. Work in small sections to maintain a wet edge. Use long, smooth strokes for even coverage. Switch to a roller for large wall areas. Load the roller evenly with paint to avoid drips and uneven application.
Roll in a W or M pattern, then fill in the gaps for consistent coverage. Overlap slightly with previously painted areas to blend seamlessly. Apply paint in thin, even coats rather than one thick layer. This approach prevents drips and ensures better adhesion. Allow each coat to dry completely before applying the next. Most paints require at least two coats for full coverage and durability. Pay attention to lighting conditions to spot any missed spots or uneven areas.
Touch up as needed before the paint fully dries. For textured walls, use a thicker nap roller to reach into crevices. Consider using a paint sprayer for large, open areas if comfortable with the equipment. Always work from top to bottom to catch any drips or runs. Take breaks as needed to maintain focus and precision throughout the project. These techniques help achieve a smooth, professional-looking finish on garage walls.
Troubleshooting Your Garage Painting Project
Garage wall painting often presents unique challenges that require specific solutions. Addressing moisture issues proves crucial for long-lasting results. Install a dehumidifier or improve ventilation to combat persistent dampness. Use moisture-resistant paint in areas prone to condensation. For concrete walls, apply a concrete sealer before painting to prevent moisture penetration. Tackle oil stains with specialized cleaning products and stain-blocking primers.
Address efflorescence on concrete or brick walls by cleaning and applying an efflorescence remover. Use a wire brush to remove loose material before painting. For uneven or heavily textured walls, consider skim coating to create a smooth surface. Deal with peeling paint by scraping off loose areas and sanding before repainting. Address cracks in concrete floors that extend to walls with an elastomeric patching compound. Use epoxy paint for floors to prevent future moisture issues that could affect walls.
For garages with poor lighting, choose light colors and consider adding more fixtures. Combat dust accumulation by using a paint with anti-static properties. Address insulation issues by applying insulating paint or adding insulation before painting. For garages with high ceilings, rent scaffolding or a tall ladder for safe access. By anticipating and addressing these common issues, the painting process becomes smoother and more successful.
Adding the Finishing Touches: Elevating Your Garage’s Appearance
After the main painting is complete, consider additional touches to enhance the garage’s appearance. Add a border or accent wall for visual interest. Use painter’s tape to create clean lines for stripes or geometric patterns. Consider stenciling designs or logos for a personalized touch. Apply a clear coat over the paint for added durability and easier cleaning. Install baseboards or trim to give the garage a more finished look.
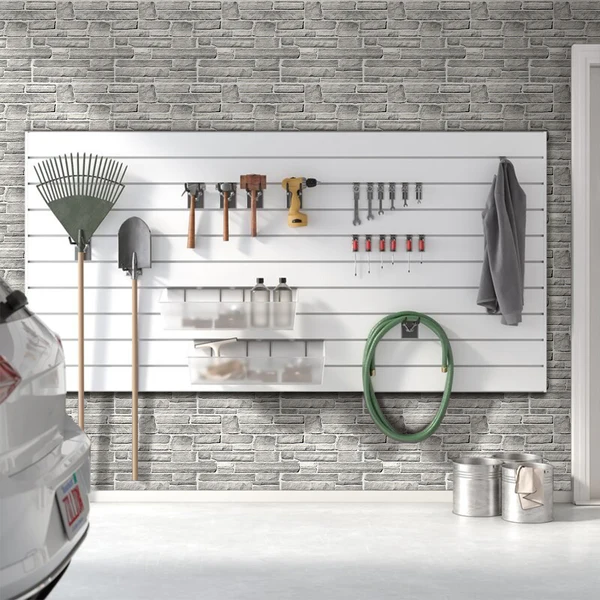
Add hooks, shelves, or a pegboard system for improved organization. Consider applying an epoxy coating to the floor to complement the newly painted walls. Install better lighting to showcase the new paint job and improve functionality. Use decorative vinyl decals for a non-permanent way to add style. Paint the garage door to match or complement the newly painted walls.
Add mirrors to create the illusion of more space and reflect light. Consider installing wainscoting on the lower portion of walls for added protection. Use textured paint or faux finishing techniques for unique visual effects. Add insulation behind the drywall before painting to improve energy efficiency. These finishing touches transform a basic garage into a more attractive and functional space.
Maintaining Your Newly Painted Garage Walls: Preserving Beauty and Durability
Proper maintenance ensures the longevity and appearance of newly painted garage walls. Clean the walls regularly with a soft, damp cloth to remove dust and cobwebs. Address spills and stains promptly to prevent permanent marks. Use a mild detergent solution for tougher stains, avoiding harsh chemicals. Inspect the walls periodically for signs of wear, damage, or moisture issues. Touch up small areas of damage or wear as needed to prevent larger problems.
Maintain proper ventilation in the garage to reduce moisture and prevent mold growth. Consider applying a fresh coat of paint every few years to maintain a crisp appearance. Keep tools and equipment away from walls to prevent scuffs and scratches. Use bumpers or guards on car doors to protect walls from dings. Address any leaks or water intrusion issues promptly to protect the paint.
Avoid storing items directly against the walls to allow for air circulation. Clean the floor regularly to prevent dirt and debris from kicking up onto the walls. Consider applying a clear protective coating every few years for high-traffic areas. Maintain the garage door and its hardware to prevent damage to surrounding walls. By following these maintenance tips, the newly painted garage walls will remain attractive and functional for years to come.

Transforming Your Garage with a Fresh Coat of Paint
Painting garage walls dramatically improves the space’s appearance and functionality. Proper preparation lays the groundwork for a successful project. Choosing the right paint and tools ensures durability and ease of application. Priming creates an ideal surface for paint adhesion and coverage. Mastering painting techniques results in a professional-looking finish.
Addressing common challenges head-on leads to better outcomes. Adding finishing touches elevates the overall appearance of the garage. Proper maintenance preserves the beauty and longevity of the paint job. With careful planning and execution, anyone can transform their garage into an attractive, functional space.
The improved appearance can increase home value and create a more enjoyable environment. Whether used for parking, storage, or as a workshop, a well-painted garage enhances the entire property. The satisfaction of completing this DIY project provides a sense of accomplishment and pride in homeownership.


